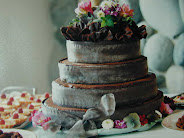
In a recent post I mentioned tweaks I employed on Flag Cake and Gougères to send them over the top. Here's that info:
Cakes
Trick 1 - Soaking Solution
The easiest way to ruin a cake is by overbaking. But even if your cake isn't baked perfectly it can be brought back to life (within reason) with a soaking solution. This is a hot sugar syrup, flavored with a bit of liqueur, pure extracts, or citrus zest, brushed or squirted onto cake layers. It adds both flavor and moisture and really improves the whole of the dessert.

A soaking solution is made by boiling equal parts sugar and water and adding the liqueur or zest once the sugar is dissolved. For the average 8-inch cake I use about 1/2 cup each sugar and water and 2 tablespoons of liqueur. The solution needs to be hot when you brush it onto the cake, otherwise it won't saturate well. I use a pastry brush to soak my cake layers (just make sure your pastry brush doesn't smell like garlic or BBQ sauce) but you can even spoon it on, tho that method takes longer.
When I bake a round cake I routinely cut off the rounded top. The crumb that is revealed is much more porous than the cake top you've removed and snacked on. But if you are not brave enough to trim the top, just poke holes all over the cake with a toothpick and then saturate.
Oh, and you want to do this to a cake that is out of the pan already. Here's the order of operations:
1. Bake a cake
2. Let it cool 5-20 minutes
3. Remove from pan, transfer to a plate
*At this point, I always let my cakes cool completely, then chill in the fridge as trimming and frosting comes out way better on a chilled cake.*
4. Make soaking solution and brush on
Trick 2 - Crumb Coat
A crumb coat refers to a thin coating of frosting that is applied to a cake. After crumb coating, the cake is retired to the fridge to set. This process sets all the crumbs in place so that when you apply a nice thick coating of frosting you don't get any crumbs ruining the view. Here's photo of the crumb and final coat:


Gougères
This recipe from David Lebovitz was really great. When I learned to make gougères in cooking school they were the sort where you made a choux pate, piped out rounds onto a baking sheet, topped the rounds with grated Parmesan or Gruyère, baked them, and then, when cool, piped into them a ham and Gruyère béchamel. They're quite good, but the béchamel is a wee bit heavy and so 1980. Quiche, brie and béchamel probably did more to usher in the aerobics era than Jane Fonda.
The Lebovitz recipe redeems the hors d'oevre in two ways: it brings it up to date (and offers suggestions for using other hard French cheeses in addition to or in place of Gruyère) and it simplifies the process by adding the cheese to the choux pate. Once the puffs are baked, they are ready to serve.


The only thing I did differently was to use a little water to shape the puffs before baking. If you aren't an expert with a pastry bag, the choux rounds can be a bit misshapen. A simple fix is to dip your fingers into a small bowl of water and then gently smooth out the choux rounds before topping with cheese and baking. I'm pretty sure I learned this trick in cooking school, but maybe it was from restaurant work. Anyway, you can see the difference in the lower photo. The rounds in the front have been smoothed out a bit.
And there you have it - three tricks all the pros know.
Saturday, July 14, 2012
Three Tricks All the Pastry Pros Know
Subscribe to:
Post Comments (Atom)


2 comments:
ohmygoah! A foodie. You're a big time foodie. I knew I liked you as soon as I met you yesterday, but I had no idea you were going to teach me how to resurrect the slightly overbaked cake with a sugar soaking solution. I LOVE it! Need to mark this blog so I can read every entry! xox, Sarah Catherine
Welcome to Pinch, SC! So glad you're here.
Post a Comment